- Select contact(s) to assign the receivable
entry
- Access the Accounts Receivable with the chosen
options
- Click the add button
- An entry line will be added
- Enter the amount of the receivable payment in the
amount field
- Set the status of entry in the status field. Status
available for selection area: Due, Paid, Void, Hold, Waive, Chargeback,
Consolidated, and Refunded.
By default, new entries are set with Due status.
- Set the due date the receivable will be received or
processed
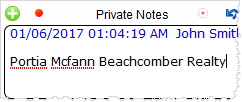
- Enter a note in the private note field. This step is
in case if you have anything to say about the receivable entry. This could be
useful once the entry is paid.
Click the + button in the
private field to include a date and the name of the agent in the note.
Note that this field will automatically be filled with specific notes once the
entry has been paid by charging the contact or was invoiced.
- If the receivable is recurrent, check mark the
RT column.
Once marked, provide the frequency on
predetermined dates of when the receivable will be received.

